

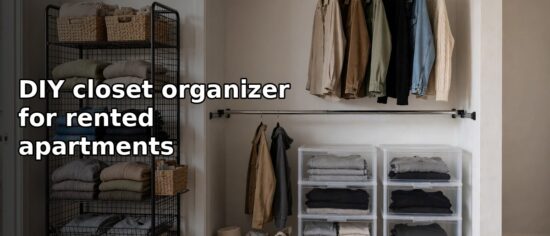
A DIY closet organizer for rented apartments is a removable storage system you build with tension rods, freestanding shelves, and hanging organizers, with no drilling and nothing left behind when you move out. Measure your closet, choose parts that fit, and assemble them in an afternoon with basic hand tools.
Key Takeaways
- Measure width, depth, and height before buying anything.
- Tension rods, freestanding shelves, and hanging organizers need no screws.
- Build in zones: hanging at eye level, folded items shelved, shoes on the floor.
- Keep heavy items low; test stability as you build.
- A basic build takes two to three hours and moves with you.
What Makes a Closet Organizer Rental-Friendly?
A DIY closet organizer for rented apartments is built to be installed, lived with, and removed without changing the closet itself: no drilling, no screws, no adhesive that peels paint, nothing left behind on move-out day. If a part needs a wall anchor, it does not belong in a rented closet.
This is a build guide, not an ideas list: measuring, choosing parts, and assembling, step by step. Check your lease first; most allow freestanding, removable storage. If you are planning other small changes too, decoradhouse renovation tips from decoratoradvice can help you tell a safe, reversible project from one that needs the landlord’s permission.
How Do I Measure My Closet Before Buying Anything?
Take three measurements: width wall to wall, depth back wall to front edge, height floor to shelf or ceiling. Write them down and carry them shopping — most organizers are sold by width.
Then measure the fit details: existing shelf and rod height, distance from rod to floor, and door opening width, since a freestanding unit must pass through it. Note obstacles such as a light fixture or sloped ceiling.
Finally, measure what you will store: folded sweaters need about 12 inches of shelf height, a hanging shirt roughly 40 inches below the rod, a dress or long coat about 65 inches. These numbers tell you where rods and shelves should go. For styling ideas once the structure is in place, see decoration tips decoradhouse.
Which No-Drill Parts Work Best?
No single part does the whole job — combine two or three types.
| Part | What it does | Best for | Watch out for |
|---|---|---|---|
| Tension rod | Adds a hanging level between two walls | Shirts and folded pants | Slips if walls are uneven or overloaded |
| Freestanding shelf unit | Floor-to-ceiling shelves, no wall fixings | Folded clothes, shoes, bins | Must fit through the door and sit level |
| Stackable shelf risers | Split one tall shelf space in two | Folded knits and T-shirts | Wobble if the shelf is not level |
| Hanging shelf organizer | Hangs from the rod, adding cubbies | Folded clothes and accessories | Takes hanging space; keep room for long items |
| Over-the-door organizer | Door pockets and hooks | Shoes, scarves, belts, small items | Check the door still closes fully |
Choose rods rated for closet use, twist each until it presses firmly against both walls, and test it with a few heavy items before loading it fully. If a rod slips, use a freestanding garment rack instead.
How Do I Build a DIY Closet Organizer for Rented Apartments Step by Step?
Tools: tape measure, pencil, step stool, level, scissors. Materials: a tension rod or two, a freestanding shelf unit, stackable risers, hanging organizers, shelf liner. Buy parts that can be returned, and work in this order.
- Empty the closet and wipe the shelves, rod, and floor so parts sit flat and grip.
- Sketch the layout: hanging zones, shelf zones, floor space for shoes.
- Place the shelf unit first — the largest piece — and level it with folded cardboard under a short leg.
- Add stackable risers inside the unit and on the existing shelf for a second folded-clothes level.
- Install the tension rod below the existing rod, leaving 40 inches above the floor for shirts.
- Hang the shelf organizer from the existing rod and add shelf liner to each shelf.
- Put the over-the-door organizer on the door, then test that the door closes fully.
- Load slowly, heaviest items low, testing each rod and shelf first.
Once loaded, check the build: rods level, shelves not bowing, door closing freely. If something sags, spread the load.
How Much Does a DIY Closet Organizer Cost?
A basic build is one of the cheapest home upgrades you can do: the parts are simple and reusable, and every part of a DIY closet organizer for rented apartments can move with you.
| Item | Typical price range | Notes |
|---|---|---|
| Tension rod | $10–$20 | Closet-rated, not a shower curtain rod |
| Freestanding shelf unit | $30–$80 | Biggest cost; measure width and door |
| Stackable shelf risers | $10–$25 a set | Cheapest way to double shelf space |
| Hanging shelf organizer | $15–$30 | Sturdy fabric shelves that hold their shape |
| Over-the-door organizer | $15–$25 | Check door thickness and clearance |
| Shelf liner | $5–$10 | Stops sliding; protects the existing shelf |
Buy for your biggest problem first: a tension rod and hanging organizer if hanging space is the issue, a shelf unit and risers if folded clothes are the problem; add parts later. Weighing bigger changes? upgrades decoradhouse compares small, reversible improvements with larger projects.
How Do I Keep the Organizer Stable Without Screws?
Stability without screws comes from fit, balance, and weight placement: a tension rod stays up by pressing firmly against two flat walls, and a freestanding unit by standing level with its weight spread evenly. Check it with a level and shim a short leg.
Keep heavy items low — shoes, denim, and bins on the floor or lowest shelves, light items higher up — to lower the center of gravity. Never load one side while leaving the other empty, since uneven weight makes a unit lean. Recheck after the first week and tighten any rod that loosened.
Exceptions and Edge Cases
Some closets need a different approach. With a sloped ceiling, put the tension rod and tall items on the high side, low stackable shelves on the low side. A closet under about 24 inches wide may not fit a freestanding unit; hanging organizers and a single tension rod do the job there.
Closets with no rod or shelf are common in older rentals: use a freestanding garment rack for hanging and stackable shelves for folded clothes. If the walls are textured or uneven, test a tension rod with a light load for a day.
Shared closets need a clear split — one side per person. If your lease forbids even removable door hooks, skip the over-the-door organizer and hang one on the rod instead.
Frequently Asked Questions
Can I build this without drilling any holes?
Yes. Tension rods, freestanding shelf units, stackable risers, and hanging organizers install without drilling, and every part comes out cleanly when you move. Skip adhesive hooks on painted walls.
How long does it take to build?
About two to three hours: fifteen minutes to measure, about an hour to assemble, the rest to load and adjust.
What if my closet has no rod or shelf?
Use a freestanding garment rack for hanging and a freestanding shelf unit for folded clothes. Both stand on the floor and move with you. A tension rod still works if the walls are flat and the span fits.
Will tension rods damage the walls?
A properly fitted rod leaves no holes, but it can mark soft paint or wallpaper. Put shelf liner or felt between the rod end and the wall to spread the pressure.
Can I take the organizer with me when I move?
Yes, that is the point of a DIY closet organizer for rented apartments. Disassemble in reverse order, pack flat, and measure your next closet first.
How much weight can a no-drill organizer hold?
It depends on the part. A good closet tension rod holds about 20 to 30 pounds; a freestanding shelf unit holds far more if the weight is spread and kept low.
Conclusion
Building a DIY closet organizer for rented apartments takes an afternoon, a tape measure, and a few removable parts — and leaves no trace when you move out. Measure first, build in zones, keep heavy items low. Matching bins and one hanger color make the finished closet look planned, and simple decor tips decoradhouse can help you choose them. Start with the tension rod and one shelf unit this weekend.